Mini Rig
Introduction:
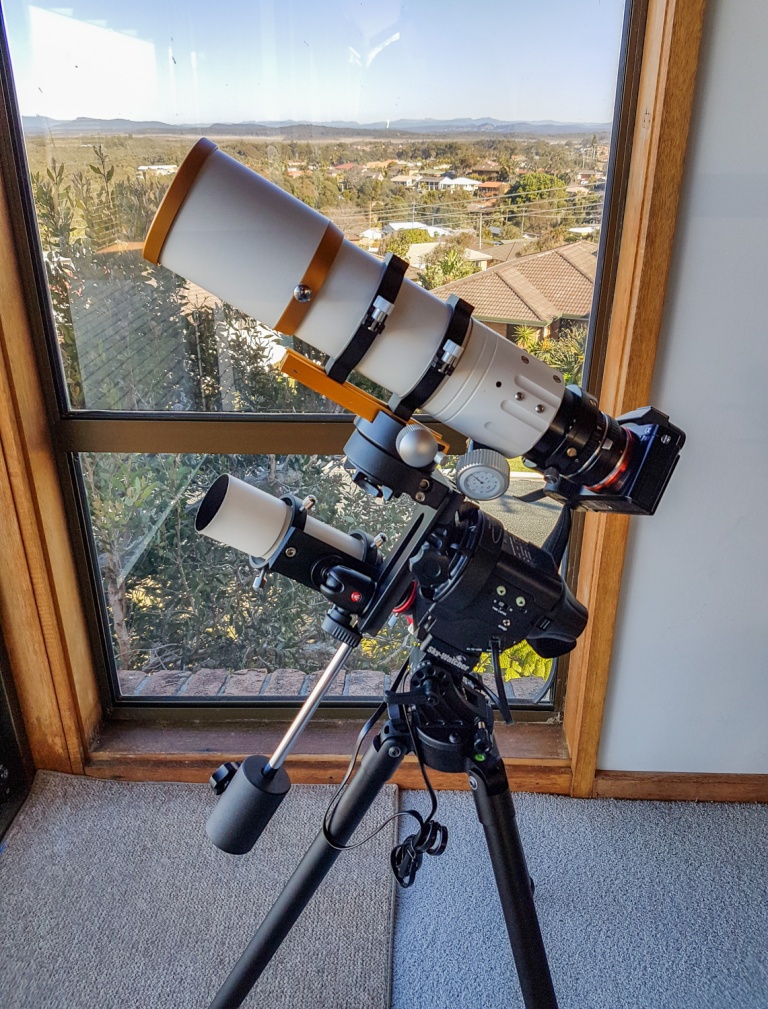
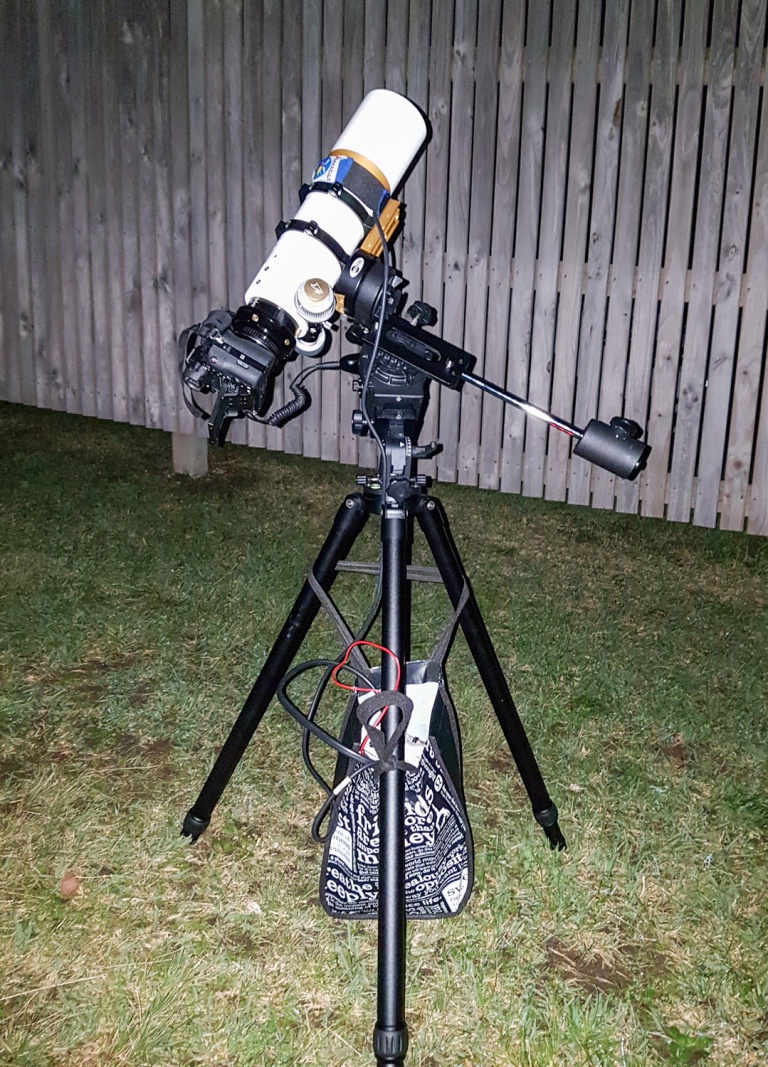
This post is about a new mini setup I’ve put together to use while traveling. The setup consists of a William Optics Star71 refractor on a Skywatcher Star Adventurer mount, the imaging camera is a Sony A7s (unmodified), with a ZWO ASI120mc guiding through a 50mm William Optics guide scope.
The Plan:
I usually image with a much bigger, and less portable, setup consisting of a Takahashi TSA120 on a Skywatcher EQ6, imaging and guiding with an SBIG STT8300 + AO-8T + FW8G. I’ve been interested in the Star Adventurer since I heard about it and recently decided to grab one to do some widefield imaging with my A7s with some lenses ranging from 20mm to 200mm. I also really wanted a setup that didn’t require a lot of power. The WO Star71 wasn’t initially part of the plan but the opportunity presented itself and I couldn’t resist!.
First Test:
The night after I got the mount I had the opportunity to test it out under semi dark skies, at least dark compared to the middle of the city where I live…
For this first time out I was planning to use the A7s with some lenses so even though the Star Adventurer package I got included the right angle adapter with the counter weight I didn’t use it and just attached a ball head to the front. This presented some problems as it meant there were some angles in which I wasn’t able to point the camera as the camera body would make contact with the mount. Being in the southern hemisphere polar aligning is painful at the best of times and in this case, without any means to drift align, I had to make do with a very rough alignment. Despite these issues I was able to get some decent 30 second exposures with a 35mm lens. This was enough to convince me of the potential of this little mount.
First Light:
I had toyed with the idea of getting a small refractor to use on the Star Adventurer when, a couple of weeks after my first test, and a week before I was due to leave on a 3 week road trip, I noticed a WO Star71 for sale on a forum I frequent. The Sony A7s on the Star71 has a resolution of about 5 seconds of arc per pixel so I knew it would be testing the limits of the mount but I though it was worth a try. First light with this setup occurred a week into my road trip under the normally dark skies of Cape Otway in Victoria, I say normally as on this night the moon was about first quarter so the sky was pretty washed out. I put the guide scope on the mount and did a quick drift align, using PHD, and then got imaging. On this occasion I didn’t have a proper intervalometer, just a remote trigger, for the A7s so I was limited to 30 second exposures and so I didn’t bother guiding. One major benefit of using the A7s is the crazy ISO 409600 setting which, while useless for capturing anything of quality, is very useful for finding and framing objects. Here is a quick video showing me framing up some objects using ISO 409600.
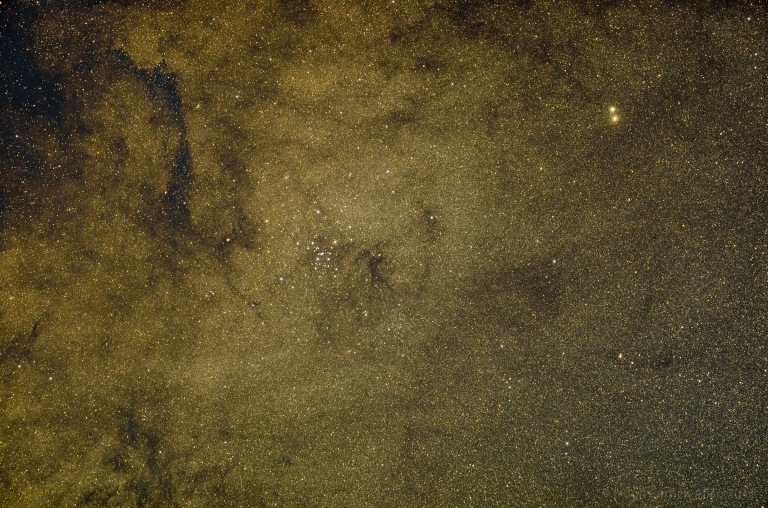
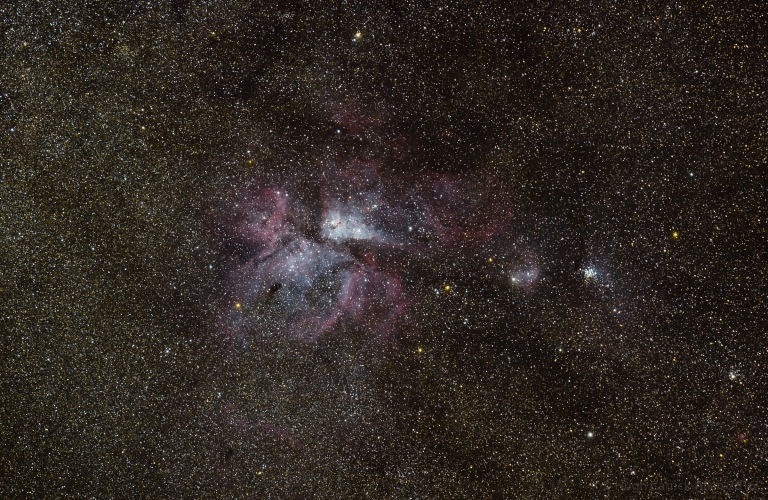
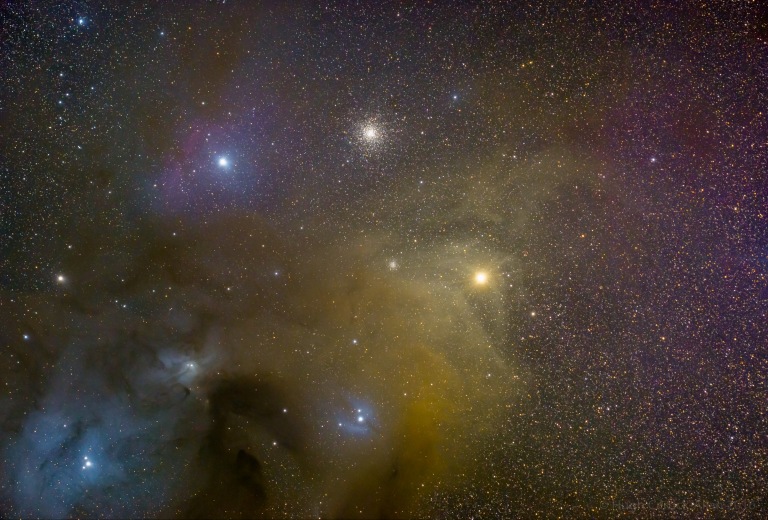
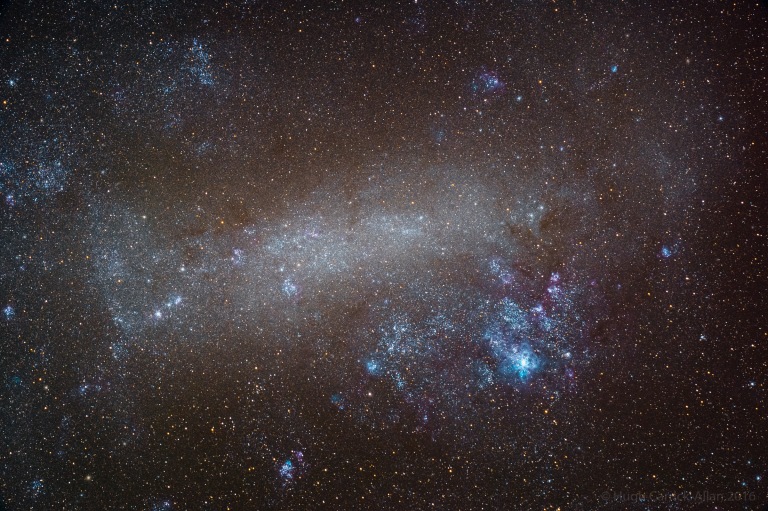
The following images are all between 50-100 30 second subs at ISO3200, also they’ve all had a tiny bit of the edges cropped out where there was a very small amount of vignetting. I think they’ve turned out ok except I’m not happy with the stars clipping out to white. I think the only way to really fix that will be shooting at a lower ISO where the dynamic range is higher (A7s DR).
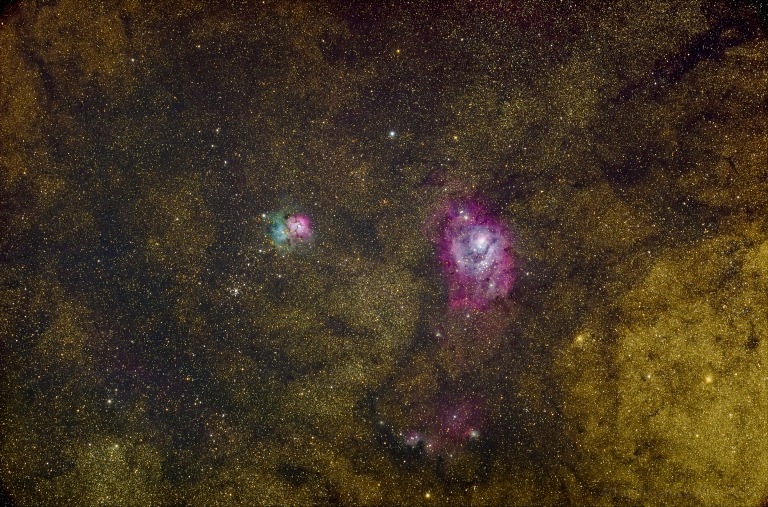 M8: The Lagoon Nebula plus M20: The Trifid Nebula
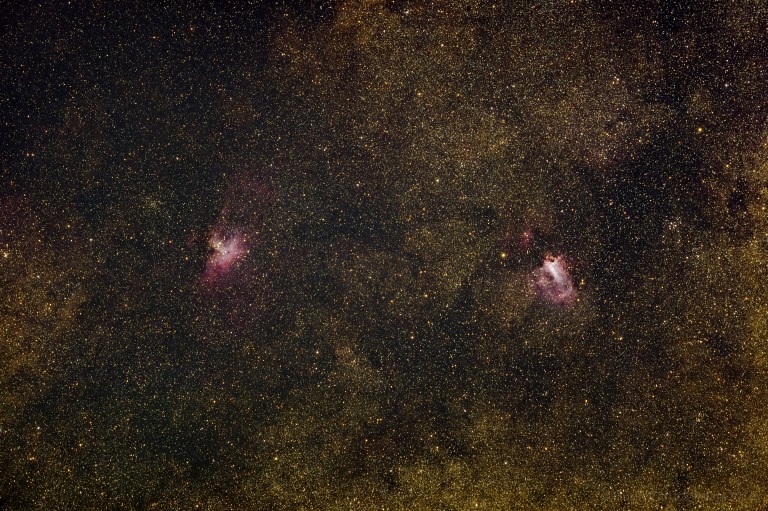 M16: The Eagle Nebula plus M17: The Swan Nebula
Longer exposures:
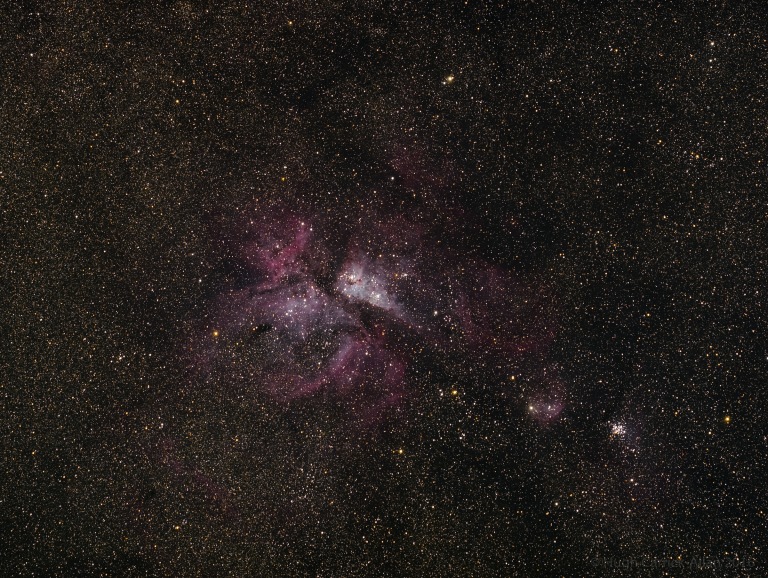
A few weeks later, during new moon, I had a couple of nights under pretty dark skies in Port Macquarie in NSW. My goal for these sessions was to lower the ISO to 800 which should result in an almost 4 fold increase in dynamic range. That would mean exposures of 2 minutes and that would mean guiding would be nessesary. The first night I did a fairly rough drift alignment and got straight into imaging. The guiding wasn’t too bad but it’s effectiveness was really dependent on how the mount was balanced. When using my EQ6 I generally try to keep everything weighted a bit heavy on the East side, and this makes a small improvement to my guiding. On the Star Adventurer this was absolutely nessesary as if the mount was neutral or West heavy the guiding was terrible and once I realised this everything went a bit smoother. However I still found it really hit and miss when doing 2 minute exposures so I ended up limiting them to either 60 or 90 seconds and this meant I had to up the ISO to 1250. These were all about 30 subs of 60 or 90 seconds at ISO1250.
Conclusion:
I think with a bit more effort I can get reliable 2 minute exposures however even without guiding, and just sticking to 30 second exposures, I’m happy with the results – especially considering how compact the whole setup is. Also it’s a bit of a surprise how sensitive the A7s is to Ha, I wasn’t expecting that when I got it and I had been considering getting it modified but I don’t think I’ll bother now.
Notes:
- Images were all processed using Pixinsight and Lightroom and have been resized down from their original resolution.
- In the photo above the bag at the bottom is there to hold a 17Ah SLA battery which is a bit overkill for running one dew heater but it helps weigh the mount down.
- The Mount runs on 4 x AA batteries and after about 16 hours or so and they’re still going strong.
Hey Hugh,
Great images I aspire to take shots like these!
I wanted to ask what tripod you use for this travel set up.
All the best
Mark
Thanks Mark!
The tripod is the Star Adventurer Tripod: https://www.bintel.com.au/product/skywatcher-star-adventurer-tripod/
But you can use any sturdy tripod that you like as the Star Adventurer has a standard 3/8-16 socket.
Good luck with your astrophotography :)
Cheers,
Hugh.
HI,
where do you get the guide scope holder to the tripod head? Thank you.
Hi, it’s basically a dovetail bar which the guide scope rings are attached to and it has a socket in the bottom that fits a tripod screw.
The one I use was one that I 3D printed but you can buy similar ones.
Lovely portable set-up!
I have a Sony A7 and a newly delivered Star Adventurer. I plan on getting the zs61 or ZS71 frac like you have.
I noticed you don’t have much space between yout camera and the scope. I see other images and notice many inches of distance between the camera and telescope.(field flattener, t-ring adapter, extender?).
What did you have in between to attach? I’m asking this bec ill eventually have to purchase them too 😬
Thanks for the time!
Hi John,
When focused the camera would be another inch or so from the scope, but it is pretty minimal back there. Mine came with a Canon EF adapter which screws straight to the end of the focuser draw tube – which is a 2″ thread and not T2 thread as is normal. Then I’ve got an EF to Sony E mount adapter. Also the Star71 is a quadruplet and it’s creating a flattened image so no flattener necessary.
I guess for a ZenithStar you’ll need a flattener but you could give it a go without one to start off with and see how you go, then get one later if you need it.
Good luck!
Hi Hugh,
Total newbie here. I didn’t realize it was a quad. Wow! For my budget, the ZS61 or ZS71 would work. I may try it out without the flattener first as you suggest. I plan to use the ZS71 for:
1. Unguided imaging up to 1min subs is good.
2. Occasional visual use(hence i prefer this to the ZS61).
I’m just confirming weight and balance was not much of an issue with the star adventurer at 1min subs?
Thank you again!
Hi John,
With my setup 1 min subs were ok but only if everything was perfectly balanced and aligned. The ZS71 has a longer focal length than my Star71 plus your A7 has smaller pixels than my A7s which means your setup will be much less forgiving of errors than mine is.
Are you looking at the StarAdventurer because of portability or budget? If you don’t need the portability then perhaps something a little sturdier, like an EQ5, would be better? (I’m not really up to date with the current offerings so perhaps there are other options around that price)
One of the golden rules in beginning astrophotography is to spend more on your mount than on your scope. That way you’ll be able to get the most out of whatever you put on it and won’t get too frustrated with bad tracking/guiding.
If you do want the portability then perhaps look at a shorter focal length, like a 100mm or 200mm lens, to go with the SA. These days when I use the SA I usually do wide field stuff with an old 80mm f2 Nikon Ai lens.
Sorry to add more to the confusion!
Hugh.
Hi, how are you satisfied with that tripod? I’m looking for some suitable one and this seems like good option for good price.
I think it’s good for the price and I haven’t had any issues with it so far. If I had any complaint it would be that it’s perhaps a bit too light-weight, which is why I had weighed it down with the battery in that last picture.
Thanks for reply. I hoped it would be more stable than my Zomei Z668 tripod, but if you say it’s light-weigh, it would be no improvement.